Validate a model configuration
In your modeling workflow, you might have multiple candidate models that contain mistakes and generate unphysical predictions. You can use the Validate configuration operator to check the outputs of these models. In the case of compartmental models, the operator can run the basic check wherein the population of every compartment, for all timepoints, is non-negative and less than or equal to the sum of the initial condition values.
The Validate configuration operator supports several types of constraints you can build to check for additional assumptions on the inputs and outputs of the model:
- "greater/less than or equal to": that a model quantity (state variable, parameter, or observable) be bounded below/above by some threshold value.
- "increasing/decreasing": that the time derivative of a model quantity is positive or negative.
- "linearly constrained": that several parameters satisfy a linear constraint of the form
L ≤ a_1 * p_1 + a_2 * p_2 + ... + a_k * p_k ≤ U. - "following": that a model quantity remains within some range of a given time-series dataset for all given timepoints (not yet supported).
The output of this operator is a new model configuration that represents the largest region in the parameter space (as defined by the input configuration) which satisfies all the given constraints.
Validate configuration is powered by the run_validate function of the Functional Model Analysis (Funman) package.
Example
-
Given a SIR-type compartmental model where the state variables represents relative fraction of a total population, you want to check that:
- All the state variables are greater than zero,
- They are less than one,
- The
S(t)state variable is decreasing monotonically (assuming no births), and - The
R(t)state variable is increasing monotonically (assuming no deaths).
-
Given a model with parameters
β, γ, you want to find what model configuration would satisfy the linear inequalityβ ≤ 2 * γ. You can create a constraint of the form:parameters β, γ should be linearly constrained from timepoint 0 timepoint 30 days with inequality
0 ≤ -1 * β + 2 * γ.The result is a model configuration where the parameters
β, γare uniform distributions, covering a region of parameter space where the inequality is satisfied.
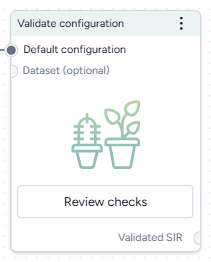
Validate configuration operator
The Validate configuration operator takes a model configuration as an input and returns a validated model configuration as output. The output can be used in simulation operators downstream.
Tip
When setting up the input configuration:
- For each parameter of interest, specify a wide uniform distribution in the input configuration so the Validate configuration operator has a sufficiently large parameter space to search for regions that satisfy all the given constraints.
- You can use the Edit model operator to define observables for quantities that do not correspond to any existing model state variables or parameters.
How it works: funman
-
Inputs
- Model configuration
- Dataset (optional)
-
Outputs
Validated model configuration
Add the Validate configuration operator to a workflow
-
Do one of the following actions:
- On an operator that outputs a model configuration, click Link > Validate configuration.
- Right-click anywhere on the workflow graph, select Config & Intervention > Validate configuration, and then connect a model to the Validate configuration input.
Validate a model configuration
The Validate configuration operator allows you to define model checks and produce validated model configurations using:
- A wizard view with the most common settings.
- A notebook view with structured JSON inputs and outputs.
Open the Validate configuration operator
- Make sure you've connected a model configuration to the Validate configuration operator and then click Open.
Use the wizard to validate a model configuration
Use the wizard view of the Validate configuration operator to apply validation settings. You can:
- Include common compartmental constraints.
- Build your own custom constraints.
- Choose how to run the validation.
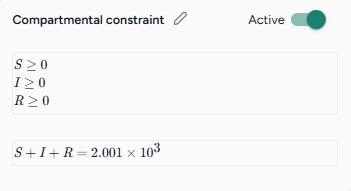
Use compartmental constraints
Compartmental constraints provide a simple validation layer for your model configuration by enforcing basic physical that make sure:
- The state variables don't become negative for all timepoints.
- The total population of the model are conserved and constant for all timepoints.
Troubleshooting the compartmental constraint
In the case where the compartmental constraint prevents results from being returned, try defining it as a custom constraint:
-
Prompt the Edit model AI assistant to:
Create an observable that is the sum of all the state variables -
Create a new configuration for the edited model.
-
Add a custom constraint that linearly constrains the new observable above and below the total population.
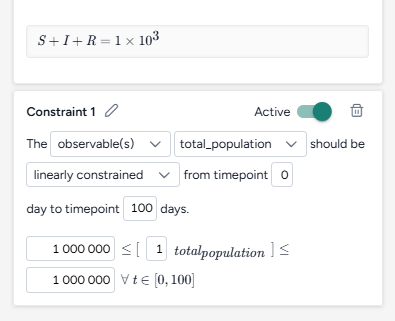
Custom version (bottom) of the compartmental constraint (top) limiting the new observable above and below the total population.
Turn the compartmental constraints on or off
- Turn the Active toggle on or off.
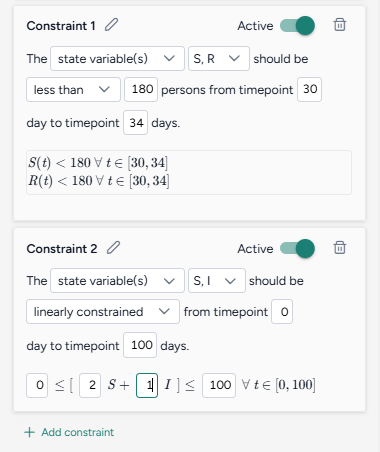
Add a custom constraint
By building custom constraints, you can tailor the validation process to your specific needs. You can constrain state variables, parameters, and observables to adhere to rules or trends critical for your analysis.
Terarium simplifies the process of building constraints by reducing them to readable sentences from which you select your preferred options. When you're done, the constraint is summarized as one or more mathematical expressions.
Add a constraint
- Click Add constraint.
- Click Edit , enter a unique name, and then click Apply .
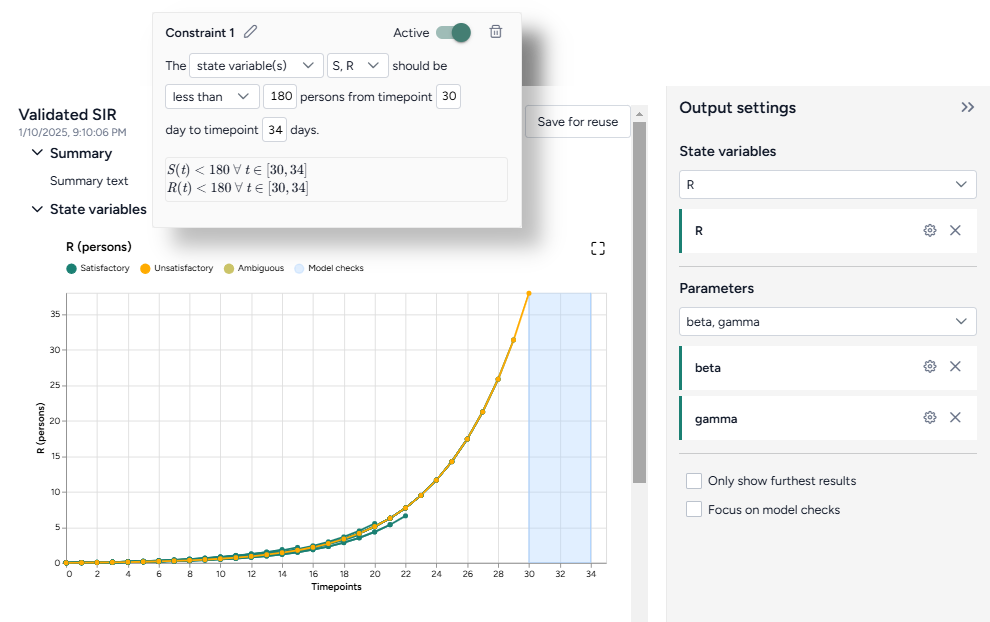
Keep a model quantity above or below a value
- Select the type and name of the quantity you want to constrain.
- Select the condition that the quantity should satisfy—less than, less than or equal to, or greater than—and then specify the value.
- Choose the timepoints between which the condition should be enforced.
Keep a model quantity from increasing or decreasing
- Select the type and name of the quantity you want to constrain.
- Select the condition that the quantity should satisfy—increasing or decreasing.
- Choose the timepoints between which the condition should be enforced.
Enforce a linear relationship between model quantitys
- Select the type and name of the quantitys you want to constrain.
-
Select the linearly constrained condition and then in the formula below, enter:
- The weights for each quantity.
- The lower and upper bounds between which the weighted quantitys should stay.
-
Choose the timepoints between which the condition should be enforced.
Turn off a constraint
- Turn the Active toggle off.
Delete a constraint
- Click Delete
Configure the run settings
Run settings let you customize the scope and precision of the validation process. To help you get started, you can choose between fast or precise presets.
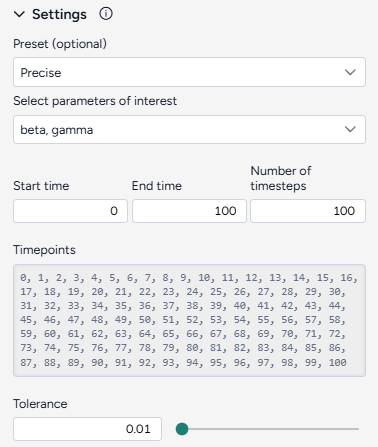
Configure the run settings
- Select a Preset, Fast or Precise, to balance between run time and precision in parameter space and prediction error
-
Select the Parameters of interest. Model checks applied on parameters that are not selected are ignored.
Note
You can only select parameters that are represented by a uniform distribution. Parameters with constant values can't be selected.
-
Choose the Start and End time.
Advanced settings
Using the following advanced settings, you can further optimize the computational efficiency and thoroughness of the validation:
- Number of timesteps: More timesteps provide a detailed view of how the model behaves over time and smaller prediction error, while fewer timesteps simplify the analysis and reduce run time when precision isn't as critical.
-
Tolerance: Controls how finely the operator segments the parameter space for validation. The value is the relative size of the smallest sub-region that will be checked for satisfiability.
1.0means "do not segment the input parameter space at all" while0.1means "segment the space down to 10% of the parameter ranges".Tip
Start with <10 timesteps, a high tolerance (~0.5), and select 2 or 3 parameters of interest for reduced run time; increase the number of timesteps and lower the tolerance towards 0.01 for higher precision and lower prediction error.
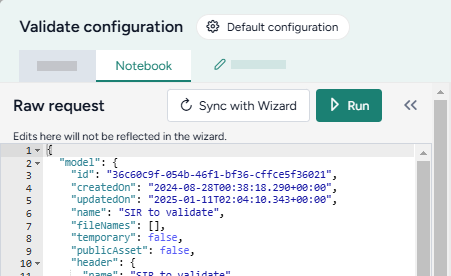
Use the notebook to validate a model configuration
The notebook exposes structured JSON that describes the model, its configuration, and the same settings available in the Wizard. You can directly edit the JSON and then run it to create a new validated configuration (also represented as a structured JSON).
Note
Changes you make to the validation JSON do not automatically copy over to the wizard.
Edit code
- Directly edit the JSON.
Sync code with wizard settings
- Click Sync with Wizard.
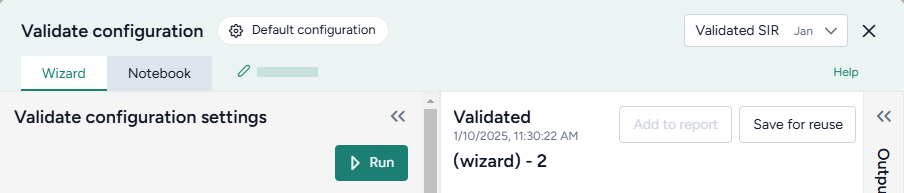
Create the validated configuration
Once you've configured the validation settings, you can run the operator to generate a new validate configuration. The new configuration becomes a temporary output for the Validate configuration operator; you can connect it to other operators in the same workflow. If you want to use it in other workflows, you can save it for reuse.
Create a new validate model configuration
-
Click Run.
Tip
The run progress of the Validate configuration operator is displayed in the workflow. Close the operator to view it.
Choose a different output for the Validate configuration operator
- Use the Select an output dropdown.
Save the new configuration for selection in Configure model operators
- Click Save for reuse, enter a unique name for the configuration, and then click Save.
Understand the validation result
The validation result is displayed as a series of plots showing the satisfactory and unsatisfactory state and parameter values over time. The following sections show how to interpret these.
Only show furthest results
When analyzing model behavior, intermediate results can sometimes make it hard to focus on the most comprehensive outcomes. You can instead display only the most extensive calculations performed for each combination of parameter values. This shows the final iteration where the model has computed the farthest timepoint necessary to ensure all checks either pass or fail.
- Click Only show furthest results.
States variables and observables
State variable and observables plots provide a time-series view of how these model quantities evolve over time. The simpler constraints (greater/less than some threshold value) are shown as light blue rectangles. Altogether, the plots show how and when each model quantity visually passes or fails the given constraints. Each trajectory is mapped from a single sampled point in parameter space:
- Dark green lines satisfy all model checks.
- Yellow lines do not satisfy all model checks.
- Light green lines are ambiguous within the precision of the validation.
- Light blue boxes show the constraints you set up.

Show or hide state variable or observable plots
- Click Expand to expand the Output settings.
-
Do one of the following actions:
- Use the dropdown to search, select, or clear different variables.
- Click X to remove a variable plot.
Focus on model checks
In some cases, the results of the validation may not approach the constraints you set up. In these instances, the model checks do not appear on the plots. To expand a plot to view the full extent of the model checks:
- Click Expand to expand the Output settings.
- Click Focus on model checks.
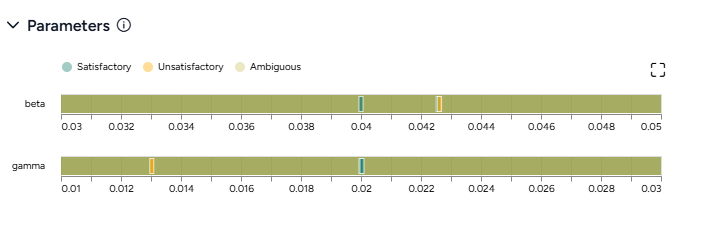
Parameter plots
Parameter plots allow you to explore how variations in model parameters influence the outcome of validation checks. These plots highlight which parameter ranges are valid and where constraints are violated:
- Dark green lines satisfy all model checks.
- Yellow lines do not satisfy all model checks.
- Light green lines are ambiguous within the precision of the validation.
Show or hide parameter plots
- Click Expand to expand the Output settings.
-
Do one of the following actions:
- Use the dropdown to search, select, or clear different parameters.
- Click X to remove a parameter plot.
Only show furthest results
The validation algorithm is efficient and only solves the model ODEs incrementally. It computes outcomes with the minimum timepoints that is necessary to guarantee that all the model checks either pass or fail. These intermediate results can sometimes make it hard to focus on the trajectories that are actually validated. You can instead restrict the plot to only these trajectories by toggling on this option.
- Click Only show furthest results.
Troubleshooting
Long run times
If your validation is taking too long, try reducing the complexity of the validation problem:
- Reduce the number of timesteps to ~5.
- Reduce the number of parameters of interest to two or three of the most important.
- Increase the tolerance to ~0.5.
- Crop out parameter ranges that cause numerical instability. For example, if you have SIR-type model and a recovery rate
γthat is an uniform distribution between-1.0and1.0, the model may become unstable nearγ = 0as the basic reproduction numberR₀ → ∞. You can narrow the distribution ofγto exclude the singularity at the origin.
Following these steps can help you reduce the run time or produce non-trivial validation results.
No satisfactory conditions
If the results contain no satisfactory conditions, it often means the entire parameter range is unsatisfactory. Try running validation again on an input configuration with wider parameter ranges.
Next steps
You can use the new validated configuration in simulations to forecast, analyze, or explore system behavior based on the validated parameters. Validation reduces the need to repeatedly reconfigure a model to find physical starting points for simulations, calibrations, and optimizations.